
I’ve tried to explain each step for the benefit of Linux beginners but it has been a while since I was one so forgive me if I gloss over some things. Please tell me and I will help out and adjust the guide accordingly.
Everything we do here should work on any flavour of Ubuntu but I find the XFCE desktop keeps out of the way the best. 12.04 is the current Long Term Support (LTS) release and has support until 2017. Until the next LTS (14.04) has been out for a little bit I wouldn’t suggest using it.
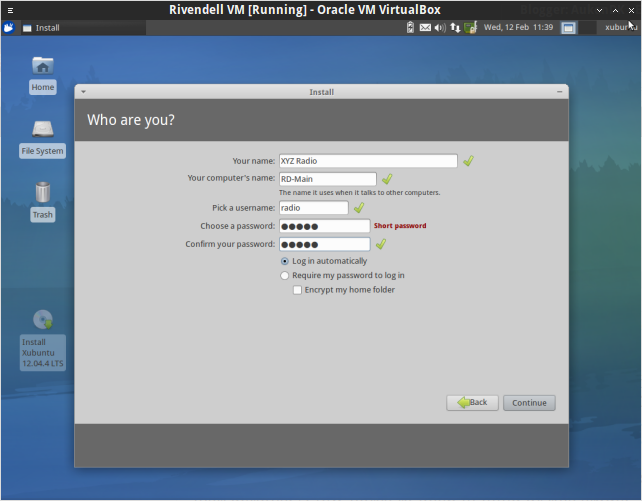
- Don’t use the user name “rivendell” as that will cause problems and conflicts.
- Make the computer name something useful if you are going to network several machines together.
- All the audio data in Rivendell is stored in /var/snd so if you plan to have multiple partitions or drives make sure /var/snd is on a larger one (or has a symbolic link).
Once you’ve installed and rebooted you will probably want to remove any applications you don’t need (games, the GIMP etc.) and make sure the system is up to date (a notification will bug you about it)
I like to customise the XFCE desktop a bit. Removing the bottom panel and moving the top one down to be more like Windows XP. Right click one of the panels, select Panel>Panel Preferences.

Now we’re ready to install Rivendell. We will use the Tryphon Debian repository packages.
- Open your Terminal Emulator (under Accessories) and enter the following:
sudo nano /etc/apt/sources.list
It will ask for your password as “sudo” is a command which gives you admin access. Nano is a simple text editor and /etc/apt/sources.list is a file which tells the system where to look for software.
Be aware that when using the terminal you can’t use Ctrl-C to paste. Either right-click and select Paste, or use shift-insert. - Scroll to the bottom of the file and type the following lines.
deb http://debian.tryphon.eu precise main contrib
deb-src http://debian.tryphon.eu precise main contribThese are the addresses for the repository. “precise” is the codename for Ubuntu 12.04 so change it if using another version.
- Press Ctrl-X to close Nano, press “y” to confirm you want to save and “enter” when it shows you the filename.
- Now run the following in the terminal
wget -q -O – http://debian.tryphon.eu/release.asc | sudo apt-key add –
This will add the repository key which will allow the package manager to make sure the updates it downloads are signed correctly. It will bug you about it every time if you don’t do it.
- Now run
sudo apt-get update
This updates the local list of packages and tells the system if there are updates to install.
- If there are no errors then the Rivendell repo has been added correctly.
Now we install.
sudo apt-get install rivendell rivendell-server mysql-server pulseaudio-module-jack
- MySQL will ask for a root password. You will need it when first installing Rivendell and later messing with the database so write it down.
- The JACK audio connection kit gets installed but I won’t talk about setting it up in this guide. Select to enable realtime priority when it asks anyway as this is one of the main benefits of using JACK.
- Select yes when it asks to setup rivendell-server and rd.conf.
- Select no when it asks about purging. You never know when you might accidentally uninstall and wipe everything.
- Select default user and group names, 48000 for the frequency, localhost for the mysql location and default username for mysql.
- Once the install has finished you’ll want to check /etc/rd.conf to check the settings. I find it sometimes doesn’t set the frequency properly to 48000.
sudo nano /etc/rd.conf
- It’s a good time now to reboot the system. You need to at least log out to update user permissions.
- Once rebooted you’ll find lots of Rivendell applications under “Multimedia” in the App menu. First we select RDAdmin.
- RDAdmin will say it can’t access the database. That’s because it isn’t there yet. Log in with “root” and the password you created earlier when MySQL was installing and it will create the new Rivendell database.

- A login will appear now. Use “admin” with no password and that will bring you to the Admin panel. Leave it for now, lets first make sure the sound is working.

- Select RDAirPlay from the Multimedia menu and you’ll see this:
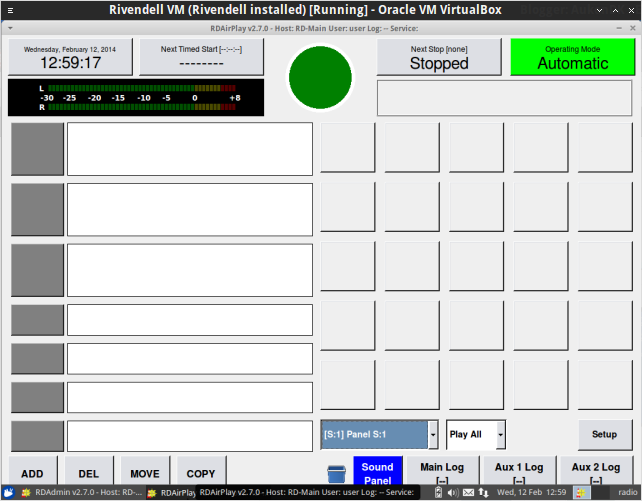
AirPlay is the main playout application for Rivendell. To test the sound out just click “ADD” from the bottom left corner, select “Test Tone” and either press the play button, or click “Ok” and select one of the now yellow buttons in the grid on the right. You will get a 10 second test tone and the meter will light up.
- Now I would suggest reading the operations guide and get playing. The Rivendell wiki is a bit unorganised, some of it cut and pasted from the mailing list, but there are some good tips and tricks in there.
I hope this guide has helped you and as I said at the beginning I will adjust anything which wasn’t clear. I have plans to create an up to date replacement for RAAbuntu with simple installation and setup scripts.